Creating a Study
Step 1: Log-in to your mymedicalimages account at https://app.mymedicalimages.com/.
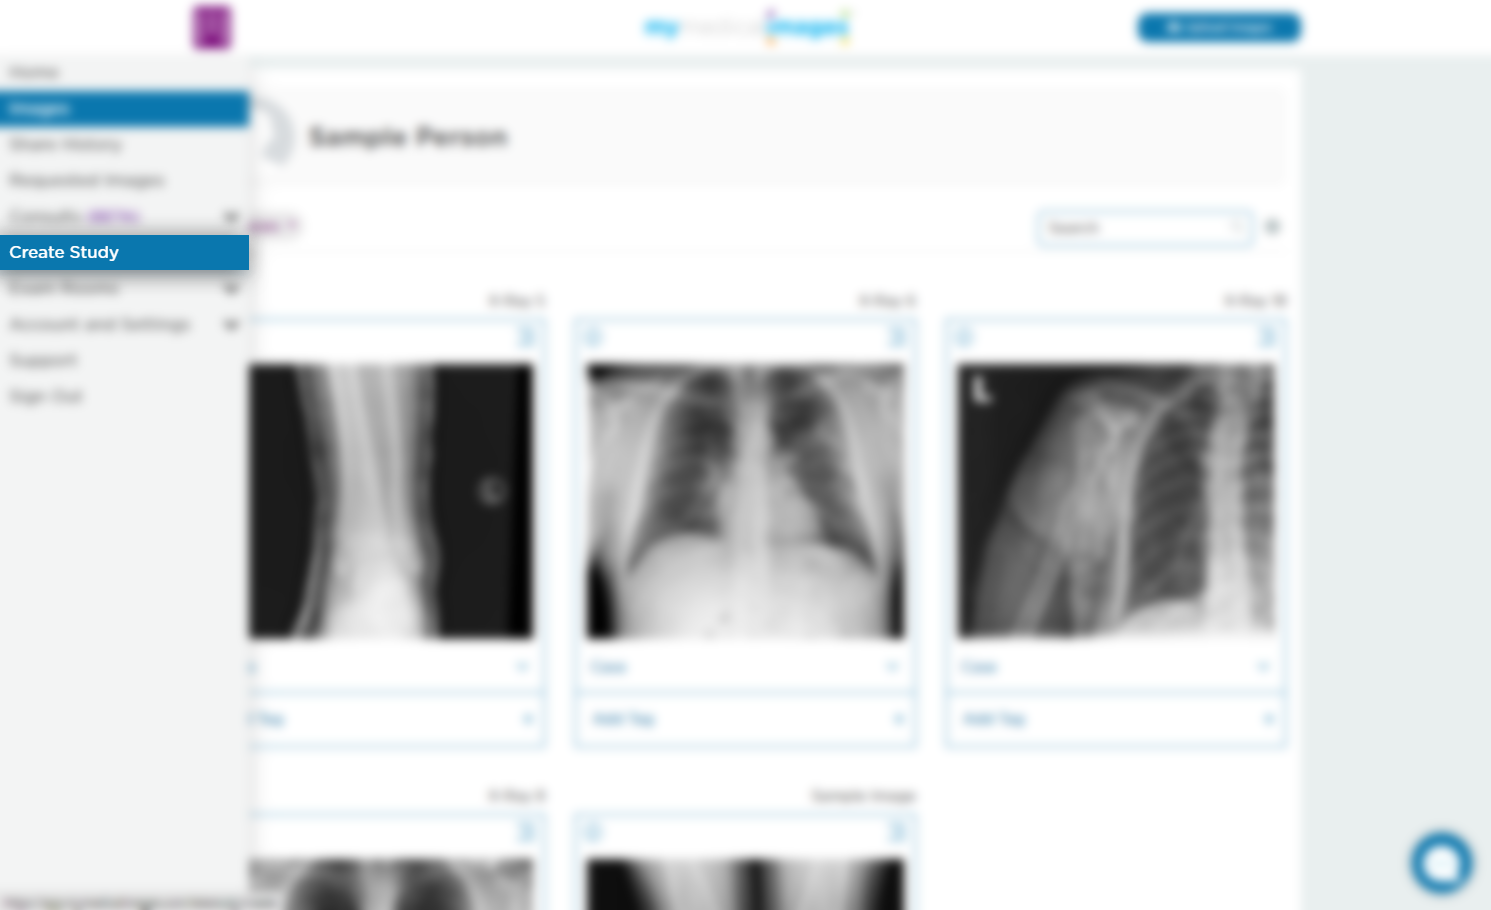
Step 2: Click on the Main Menu icon in the top left-hand corner of the page and select the “Create Study” option.
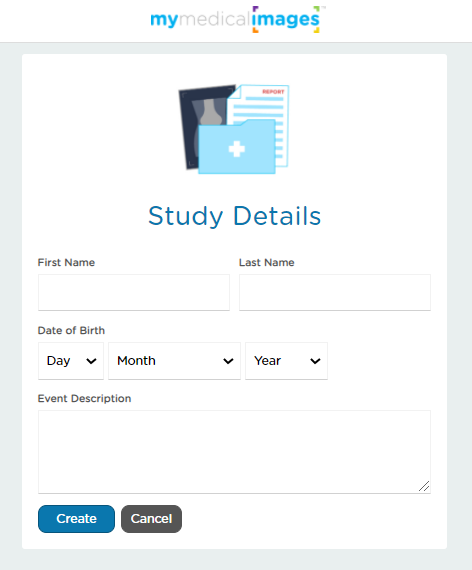
Step 3: Fill out the patient’s information in the text fields provided, including a brief description of the study, then click the blue “Create” button.
After you have created the study, you will be redirected to the studies page.
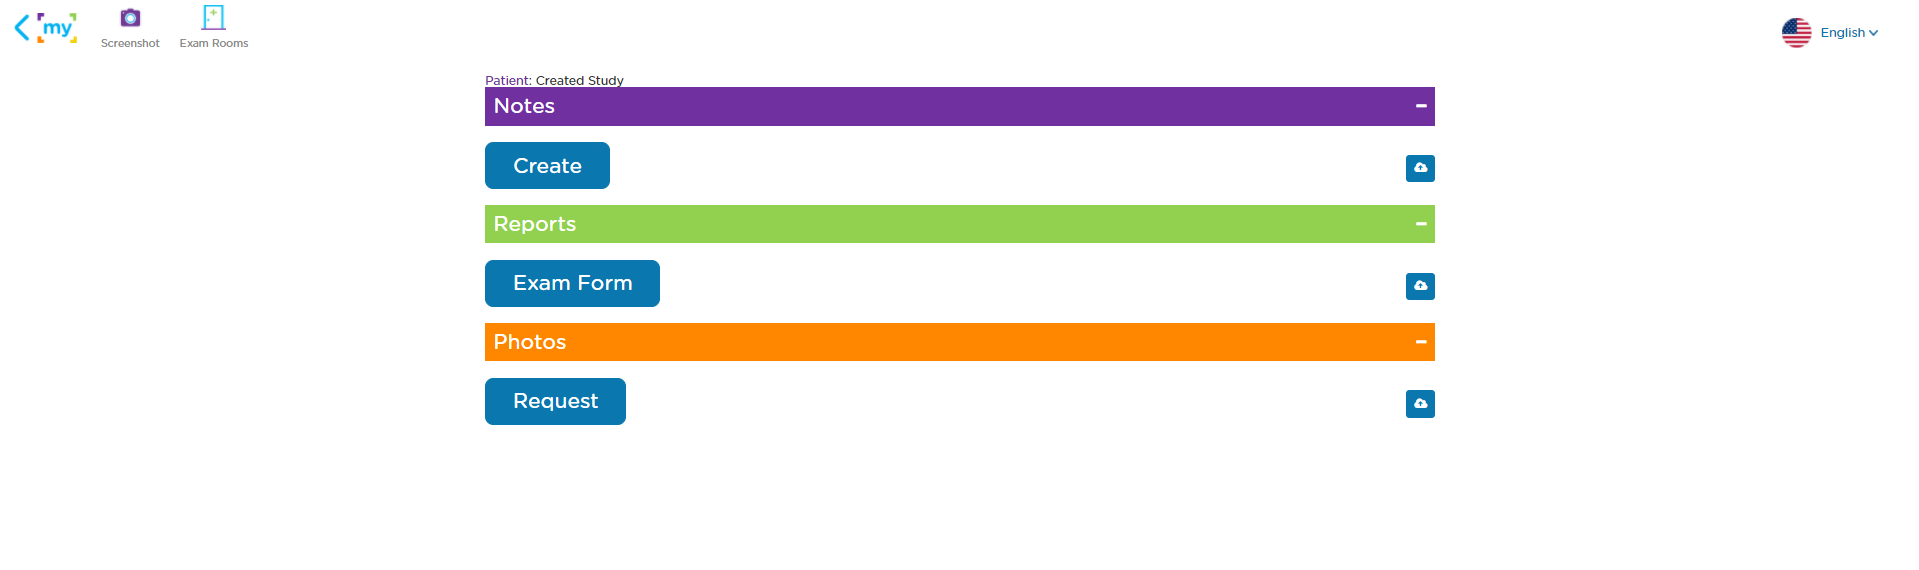
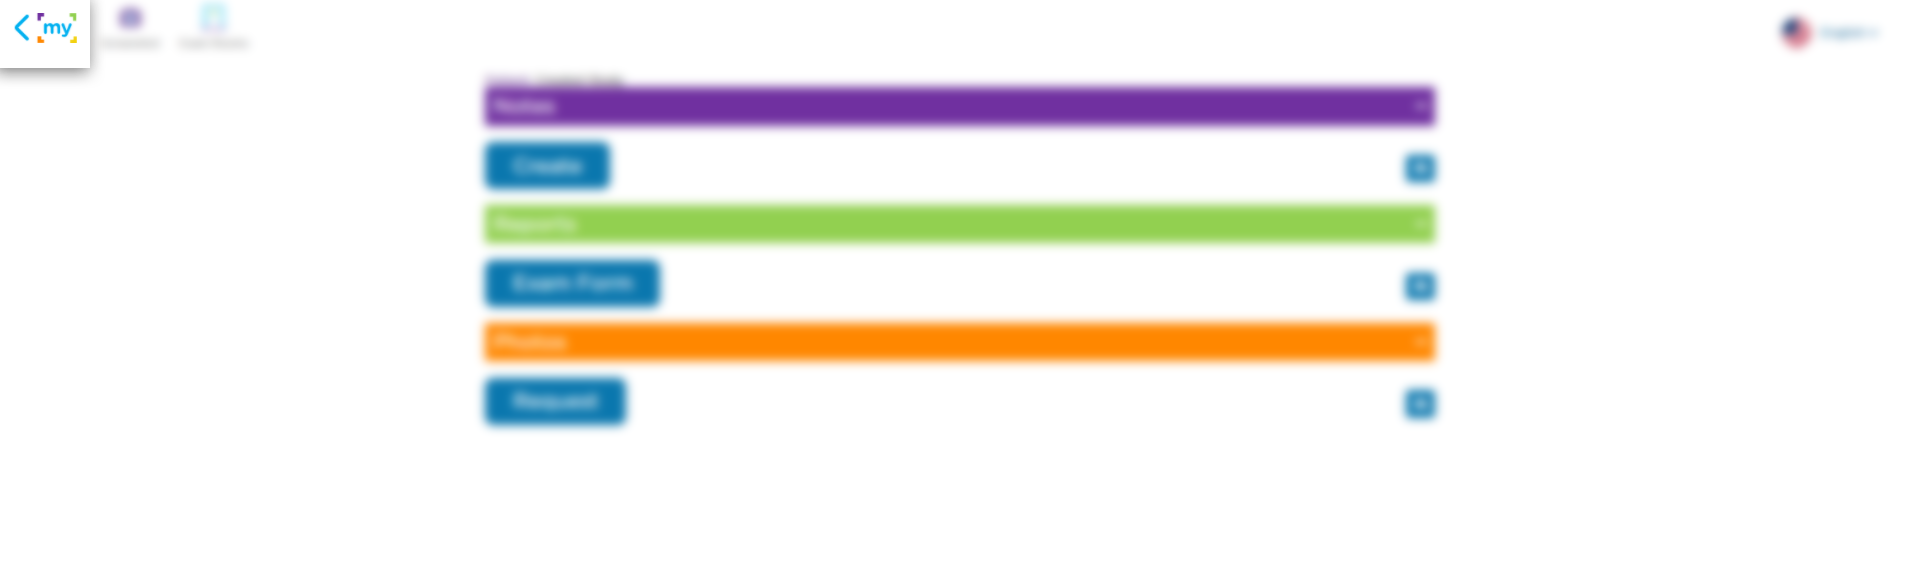
Here you can click any of the blue cloud icons to upload related Notes, Reports or Photos of the study in question.
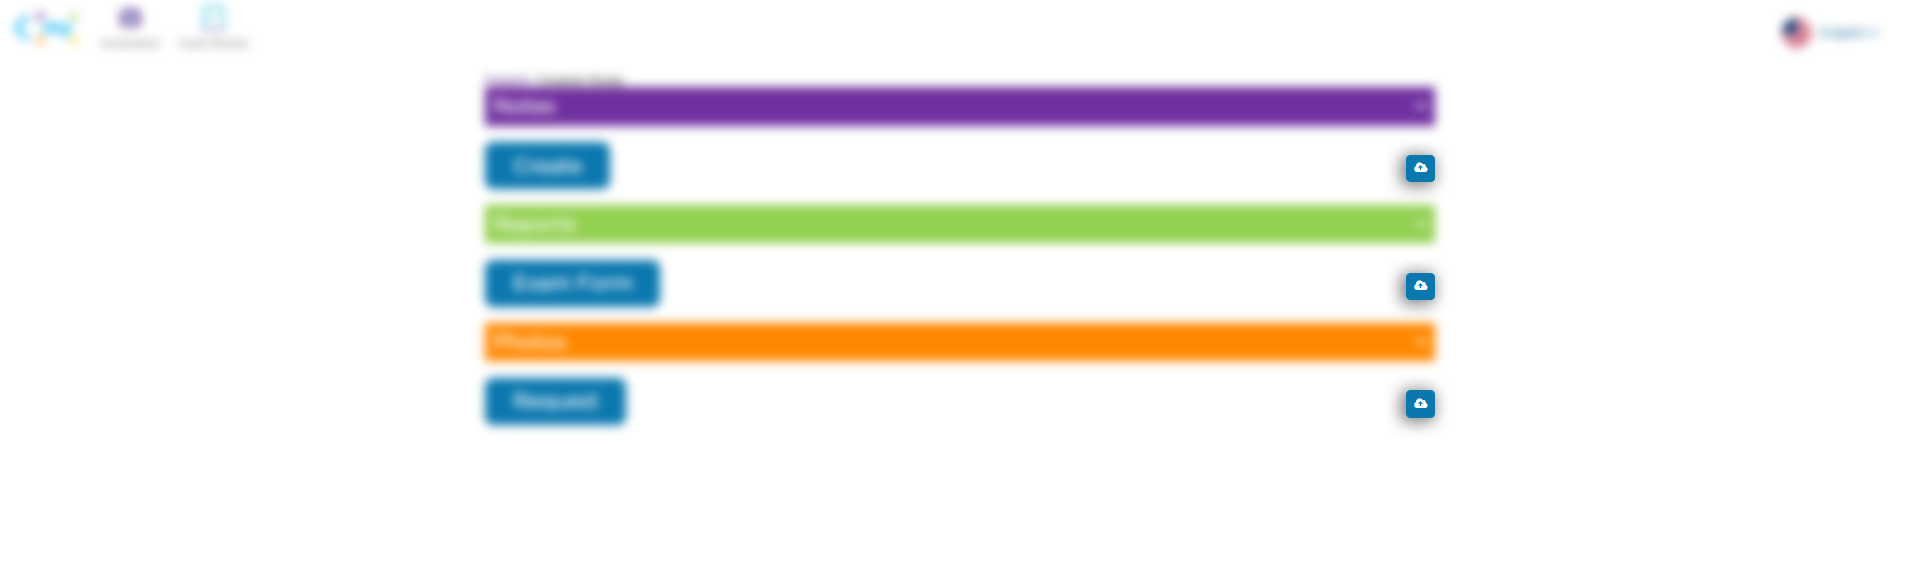
You can also create, request, or upload Notes, Exam Forms or Photos related to the study.
Notes: Hitting the “Create” button will open our note interface.
 Here you can write any relevant notes and save them as a PDF by clicking the green “Create PDF” button.
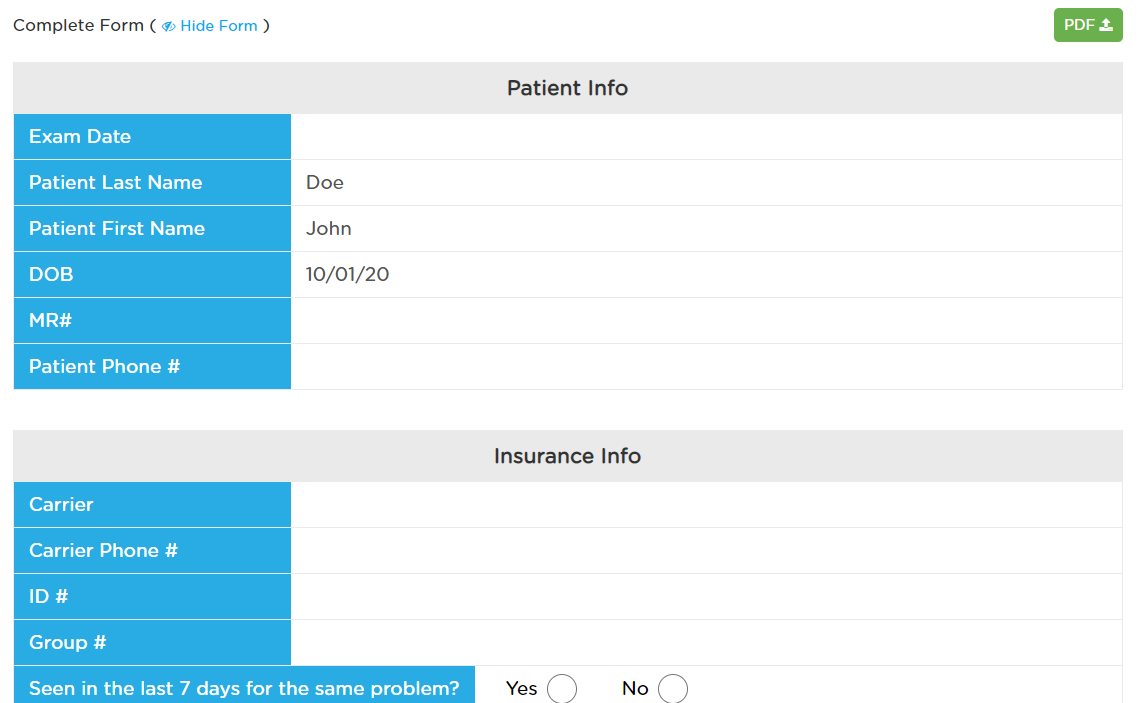
Reports: Hitting the “Exam Form” button will open our telestudy interface where you can enter all of the patient’s information and create a telestudy by choosing the green “PDF” button.
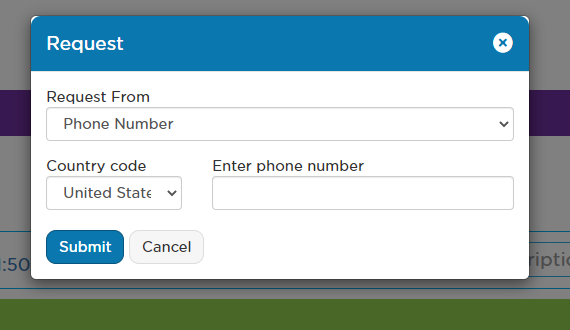
Photos: You can click the “Request” button to request images from a patient. These images can be JPEG, PNG, etc. These images will add thumbnails and become viewable on the dashboard.
When you are finished, you can click on the “My” back button in the top left-hand corner of the page to return to your dashboard where your new study will appear.